Run BelowVR privately or without internet
Run the complete BelowVR app from one computer and connect local browsers or headsets without uploading project data.
Before you start
- BelowVR Local installed on the host computer.
- Optional: a USB cable or private Wi-Fi router for Quest access.
Understand what BelowVR Local runs
BelowVR Local is the same BelowVR application packaged with its web server, database, WebSocket service and model optimiser. Your wrecks, rooms, accounts and annotations live in a profile folder on the host computer. Nothing needs to be uploaded to the hosted BelowVR service.
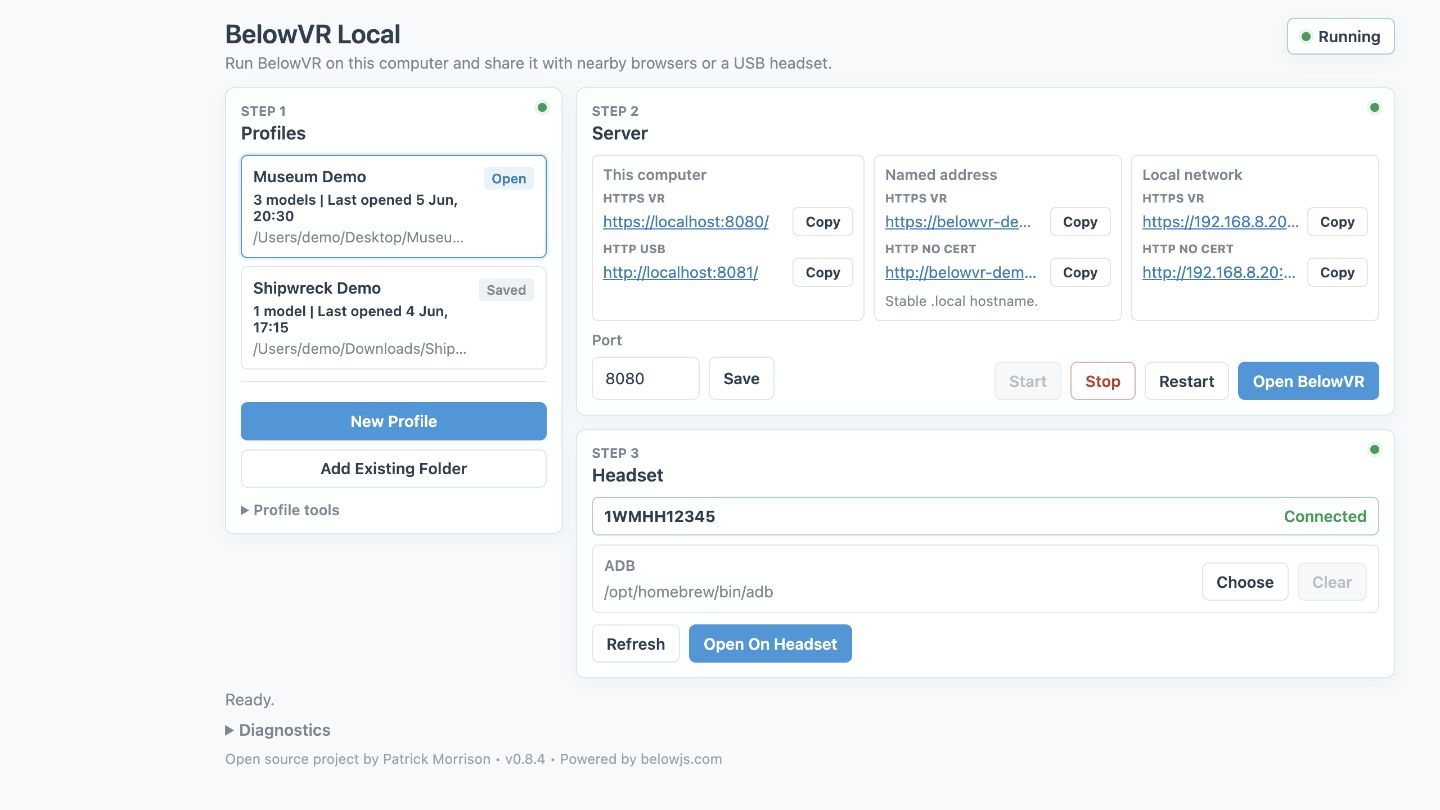
Create and start a profile
Open BelowVR Local, choose New profile, and save the .belowvr folder somewhere you can back up. Select Start BelowVR. When the status says the server is running, select Open BelowVR to enter the profile and load the project.
Connect one computer
For work on the host computer, use the Local address shown by the launcher. Create the required accounts, wrecks and rooms exactly as you would on the hosted app.
Connect a Quest by USB
Connect the authorised headset, let the launcher apply USB networking, then use its Open on Quest action. Bookmark the local HTTPS address once it works. This is the simplest field setup because it does not depend on venue Wi-Fi.
Connect several devices on a private network
Put the computer, headsets and display devices on the same router. Open the HTTPS .local or numbered LAN address shown by the launcher on each device. Accept or install the launcher’s local certificate when Quest requires it for WebXR.
Test offline and back up
Disconnect the internet and rehearse the complete session. BelowVR, models and same-network collaboration continue locally; external links and software updates do not. Stop the server before copying the .belowvr profile, and keep a verified backup on another device.